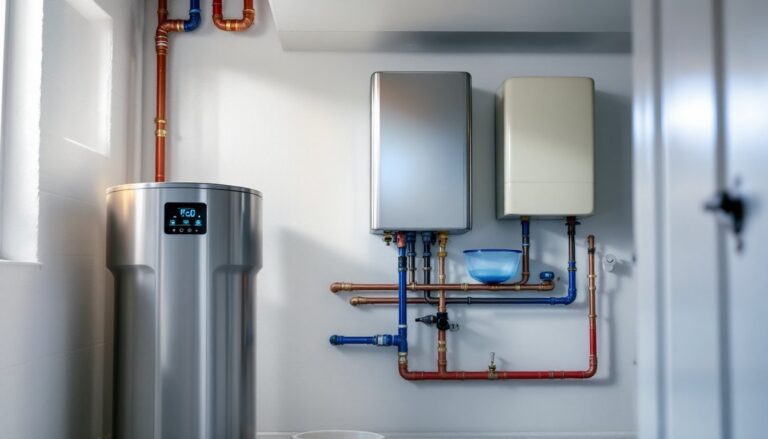
A water softener that’s leaking can turn a utility room into a disaster zone fast. Whether you’ve spotted a puddle forming under the tank or noticed water trickling from the top, a water softener leak demands quick attention before it damages your foundation, wiring, or nearby equipment. The good news? Most leaks come from loose connections, worn seals, or clogs, problems you can diagnose and fix yourself with basic tools and under an hour of your time. This guide walks you through identifying the source and applying fixes that actually work.
Table of Contents
ToggleKey Takeaways
- Most water softener leaking issues stem from loose connections, worn seals, or clogs—problems you can diagnose and fix yourself in under an hour with basic tools.
- Identify the leak source by drying the unit, turning off the water supply, and inspecting the control valve, inlet/outlet ports, or drain line to determine whether you need a simple tightening or seal replacement.
- Tighten loose connection nuts with a wrench by a quarter turn and replace worn rubber washers and O-rings (costing $15–$40) before considering professional repair or tank replacement.
- A water softener leaking from the top usually indicates control valve failure, while leaks at the tank bottom suggest either a cracked tank or blocked drain line requiring professional assessment.
- High water hardness (over 25 grains per gallon) accelerates internal corrosion and increases failure risk, so monitor hardness levels regularly to extend your softener’s lifespan.
- If a water softener is leaking from multiple locations persistently, the tank may be failing internally and professional diagnosis is worth the investment to determine repair versus replacement costs.
Why Your Water Softener Is Leaking
A water softener leak doesn’t happen without a reason. Understanding the mechanics behind your system helps you spot the culprit and prevent it from happening again.
Common Culprits Behind Tank Leaks
The water softener tank itself can develop tiny cracks or pinhole leaks over time, especially if the unit is ten years or older. Sediment and mineral buildup inside the tank corrode the inner lining, creating weak spots. If the leak is coming from the tank body itself, not a valve or connection, replacement is usually your only option, though a professional plumber should assess whether a patch kit might work for minor cracks.
Another frequent cause is improper drainage or backflush cycles. If the drain line is kinked, blocked, or undersized, pressure builds during the regeneration cycle and forces water out through seams or weak points. Similarly, a clogged brine tank or sediment blockage in the resin bed pushes water where it shouldn’t go.
Hard water mineral deposits can also calcify around internal passages, restricting flow and creating backpressure. Check your water hardness regularly: if it’s over 25 grains per gallon, your softener is working overtime and may fail sooner.
Connection and Seal Failures
Most water softener leaks happen at connections, not inside the tank. The inlet and outlet fittings, where water enters and leaves, rely on threaded connections and rubber washers to stay watertight. Over years of pressure cycling and temperature changes, these threads loosen or the washers deteriorate and crack.
The resin bed control valve sits on top of the tank and handles water routing during normal use and regeneration cycles. The O-rings and seals inside this valve wear out, especially if the water is very cold or if the unit regenerates frequently. A softener leaking from the top usually points to this valve.
Bypass valves (present on some models) can also fail. These allow you to route water around the softener during maintenance or if the unit fails. A cracked bypass seal or a valve left partially open causes steady leaks.
How to Identify Where the Water Is Coming From
Pinpointing the leak source saves time and money. You won’t know whether to tighten a valve or replace a tank until you find where the water actually originates.
Dry the unit completely with a clean towel or let it air dry for an hour. Turn off the water supply to your softener and close the bypass valve if your unit has one. Wait until the tank is fully depressurized (no more water drips for 15 minutes).
For a water softener leaking from the top, inspect the control head and valve assembly. Look for water pooling around the valve stem, dripping from the multiport valve body, or seeping from the connection where the control valve threads into the tank. Use a flashlight: moisture is often easier to spot in shadow.
If you see water trickling down the side of the tank, you’re likely dealing with a water softener leak at one of the inlet or outlet ports. These are usually compression fittings (nuts threaded onto copper or plastic tubing) located low on the tank. Wipe the fitting dry and watch for beads of water forming at the nut.
A water softener leaking from the bottom usually means either a cracked tank, a drain line connection failure, or sediment buildup blocking internal passages. Check the brine tank drain line (a small tube running from the softener to a floor drain or sump). Is it kinked or clogged? Feel the connection point where it attaches to the softener: is it loose?
For a water softener is leaking persistently from multiple locations, the tank may be failing internally. Professional diagnosis is worth the cost here.
Once you’ve located the leak, mark it with tape so you don’t lose sight of it during repairs.
Quick Fixes You Can Try Right Now
Most leaks can be stopped with basic hand tools and common hardware. Here’s how to tackle the most common repairs.
Tightening Connections and Valves
Start with the simplest fix: tightening loose connections. Grab an adjustable wrench or the correct socket size (usually ½-inch for most fittings). Locate the nut at the leak point and turn it clockwise about a quarter turn. Don’t over-tighten: you’ll strip the threads or crack plastic fittings.
For compression fittings (the kind with a brass or plastic nut screwing onto a tube), hold the fitting body steady with one wrench while tightening the nut with another. This prevents you from twisting the tubing inside the wall.
Turn the water back on slowly, watch the joint for 30 seconds, then check underneath. If the leak stops, you’re done. If it slows but doesn’t fully stop, move to the next step.
If the leak is at the control valve stem (where the top-of-tank valve plugs into the tank), try tightening the packing nut, a small hex nut just below the valve lever. Tighten gently: you’re only sealing the gland, not holding the valve in place. This often stops light seeping from a water softener leaking from the top.
Checking and Replacing Seals and O-Rings
If tightening didn’t work, the problem is likely worn rubber seals. You’ll need replacement washers and O-rings (kits cost $15–$40 depending on your model) and a flathead screwdriver.
For inlet and outlet fitting leaks, turn off the water and depressurize the tank completely. Unscrew the nut at the leaking connection and slide off the old compression fitting. Inside, you’ll see a small rubber washer (usually red or black). Replace it with an identical one from your hardware store or a kit specific to your softener model.
For control valve leaks, you’ll need to remove the multiport valve from the tank. This requires either a large socket (often 1¼-inch) or a special valve wrench (available from plumbing suppliers or HomeAdvisor contractor referral networks). Turn the valve counterclockwise and lift it off. Inside, locate the O-ring seal, a rubber ring sitting in a groove. Pop it out with a flathead screwdriver and replace it. Coat the new O-ring lightly with plumber’s grease (helps it seal), then reinstall the valve.
Before reinstalling any valve or fitting, wrap the male threads with plumber’s tape (PTFE tape, often called Teflon tape). This closes microscopic gaps and stops weeping.
Turn the water back on and monitor for 5 minutes. A water softener is leaking less severely now, or has stopped altogether. If you’re still seeing steady drips, your tank or a critical internal component may have failed, time to call a professional or budget for replacement. Many water softener brands offer extended warranties, and professional plumbers can assess whether repair or replacement makes sense based on the age and condition of your unit.
Always keep a bucket or towel under the softener for the first 24 hours after any repair. Secondary leaks do happen, and catching them early beats flood cleanup.